Jovana Tomin. Powered by Blogger.

Pages

  • Home
  • beauty
  • tutorials
  • reviews
  • faves
  • advice
  • music
  • photography
  • lifestyle
  • blogmas
  • tags
instagram

Jovana Tomin


Recently I've been loving really healthy looking skin that is a pretty neutral look, but can make you feel quite glamorous. Here's what I've been doing.
The first step is foundation. I usually use the Rimmel Lasting Finish foundation, which I mix in with moisturizer if my skin's looking good. I also conceal my horrible under eye circles with any concealer that I own (either the Maybelline Fit Me or an Aura one). The next step I cannot miss is setting everything with a powder - I use the NYX Highlight & Contour Pro Pallete, using 'Cream' for my under eye circles and 'Soft Light' for the rest of my face.
After that comes the fun part. I like to bronze my face with the shade 'Tan' from the same palette. Now that I'm not a pale zombie anymore, I sometimes like to go all out and contour my cheekbones and temples slightly using a mixture of 'Toffee' and 'Sculpt'. 

When I'm done with all that, the finishing step is highlighting, of course. The first thing I do is apply the Maybelline Baby Lips in the shade 'Peach Kiss' onto my cheekbones (I apply it straight from the bullet, but you can use a brush or your fingers). Then, I blend it in a bit and go over that with 'Nectar' from the NYX palette. Sometimes, when I wanna look super glowy I apply a bit of 'Ice Queen' on top of that. I like to apply one of those powder highlighters to my Cupid's bow and sometimes the tip of my nose, just to finish things off. 
Once my skin is looking super healthy and glowy, I like to keep the rest of my makeup quite simple - mascara, soft brows and maybe a nude lipstick if I'm feeling really fancy.
That's the whole look. It shouldn't take too long, even though it might seem a bit over the top. I'm sure you'll love it. 
Here's what it looked like when I tried to take a photo.

Bloglovin | Twitter | Tumblr
Share
Tweet
Pin
Share
No comments
I'm not a big skincare enthusiast, I just kind of use what I have and I don't spend loads of money on fancy products. However, thanks to my sister, I've discovered an Italian skincare brand which I really enjoy using - I Provenzali. I've already done a blog post on my skincare routine which featured some of their products, but now I've got some new ones that I use in the morning. 
My morning skincare routine is quite simple and includes only two products. 


The first one is their cleansing milk. I apply a small amount onto my fingers and rub it all over my face and then I rinse it off with lukewarm water. It's a really light and gentle formula and it leaves my face looking and feeling really fresh and clean.


After I've washed my face, I go in with this moisturizer. It's an anti aging one, but my mum passed it on to me because it didn't work well with her skin. Fortunately, my skin loves it! It's really light and it doesn't feel sticky at all, it doesn't take long to sink into my skin. Also, it has the nicest scent ever. I really love mixing this moisturizer with my foundation to get a lighter coverage and a healthy glow to my skin. 
These two steps take about a minute to do and leave my skin feeling really fresh and make me feel a bit more awake. 
Bloglovin | Twitter | Tumblr
Share
Tweet
Pin
Share
No comments

First off, I'd like to say sorry for the lack of content yesterday, it was a bit of a hectic day being the last day of school and all. I'm back now, though. 
If you're not a fan of red lipstick, but still wanna wear a bit of red on your face - go for the eyes, I say. That's a bit of a weird sentence, but you know what I mean. 
I've done a review of the KIKO Long Lasting Sticks a few months ago and I told you how much I love the red one. I love using in inside of my waterline, but it's also a great all over the lid colour. Because my eyes have quite a bit of green pigment in them, even though they're brown, this eyeshadow colour brings it out so much it's crazy.
Anyway, to cut the rambling, if you wanna skip the red lip on Christmas, I recommend going for a red eyeshadow (especially if you've got green eyes). This one in particular is super easy to use so you won't find yourself spending hours on it - just swipe it all over the lid and blend it out. It doesn't look like you've been punched in the eye, don't worry.
So that would be the first step - applying and blending a red eyeshadow.
The second and final step is obviously applying mascara. The one I highly recommend is the Rimmel Scandaleyes Lycra Flex Mascara (review) as it gives your lashes volume and makes them look longer and just all round amazing. (Also, can anyone tell me their thoughts on the Maybelline Lash Sensational mascara? I'm interested in buying it.)
And with that, you're done. Obviously, you can add a crease colour, a highlight shade on your brow bone and inner corner, some eyeliner, etc, but I just wanted to give you an example of a super simple look. 
However, if you'd prefer gold eyeshadow, I've already talked about that look here.
So, this is the last Blogmas post this year. It was lots of fun and I hope it's fun to read as well. I'll talk to you on Sunday I guess. Have a very Merry Christmas!
Bloglovin | Twitter | Tumblr
Share
Tweet
Pin
Share
No comments
This week I've been loving wearing certain products on my eyes, so I thought I'd let you know which ones.
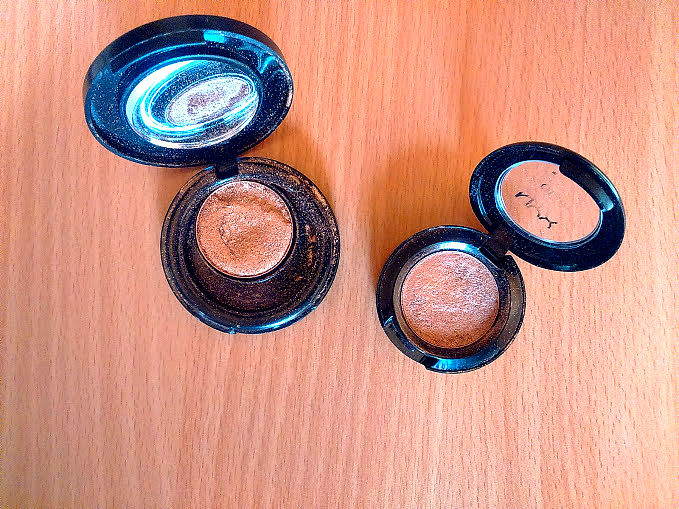
The first one is the Wjcon Creamy Push Metallic Eyeshadow in the shade 11 - it's a really pretty warm toned golden shade. I use is as a base to make sure the rest of my eyeshadows stay on longer.
The next thing I do is run the Essence Beach Cruisers Bronzing Powder (01 Life Is A Beach) through the crease to warm it up. I only use the matte bit, and I only ever use this bronzer as eyeshadow cause I don't like it for bronzing because of the shimmer. I like is as an eyeshadow because it's a really nice shade of brown, it's really warm and kind of orange and I think it complements my eye colour very nicely.
Once my crease is all warmed up, I mix two gold eyeshadows (NYX Glam Eyeshadow in 01 Boost and Isabelle Dupont Soft Velvet Mono in E20) together and pat them onto my mobile lid. If I don't feel like they're pigmented enough, I just dip my brush into my moisturizer and then go in with eyeshadow - it makes a whole lot of a difference. 
If needed, I'll go back to my bronzer and blend a bit more of it through the crease to make everything a bit more seamless. And with that, my eyeshadow is done and I just apply some mascara to finish the look off. 
That's the eyeshadows I've been going for when I wanted a full proof pretty look. I think it would look great on all eye colours, but especially on green ones as it brings out the green pigments in mine and it looks stunning.
Bloglovin | Twitter | Tumblr
Share
Tweet
Pin
Share
No comments

I've done a brow routine a few months ago, but I've changed it up and it's much more fuss free. It includes only two products and only three steps.
The first step is to simply brushing through the brows with a spoolie to get them in the right shape.
The next thing I do is use an eyebrow pencil (Golden Rose) to outline the bottom part of my brows and get them nice and neat. Then I go on filling them in and outlining the top part.
Once I've filled them in properly and got them into the wanted shape I'll finish them off with a bit of clear eyebrow gel (Essence) to set them in place and make sure they don't go crazy on me, which they otherwise would.
That's literally all I do and I've found my brows look much better this way than with the NYX powder (because the colour match and the pigmentation is better) and it's way quicker definitely. So, combined with my new foundation routine which takes no time at all, I'm done with my makeup in like 15 minutes if I decide to use mascara as well. Extra plus: you can take your eyebrow pencil with you wherever you go in case you need to touch up. 
That's all I've got for you today, bye for now.


Here's the end result.

Bloglovin | Twitter | Tumblr
Share
Tweet
Pin
Share
No comments
Recently my skin has been looking pretty good so I've been trying not to drown it in foundation (not that I ever really do that, though) and decided to try something I've heard a lot about.
What I've been doing is mixing my L'oreal True Match Foundation (as it's got lighter coverage than the Rimmel one I own) with my daily moisturizer. This technique is kind of like a 2 in 1 step cause you moisturize your skin along with evening it out a bit. Keep in mind this won't really  provide you with too much coverage, but just make your skin look closer to flawless without looking cakey. 
I use about half a pump of foundation and about the same amount, or less, of moisturizer and apply it with a flat top kabuki brush. Depending on your preference, you can adjust the amount that you use, this just happens to work for me. 
The end result I find amazing because it makes my skin look much better (evened out and smoother, I guess), but really natural, you literally can't tell there's foundation on your face.
If my under eye bags are really bad and the foundation doesn't help, I'll use a bit of concealer - either the L'oreal True Match or the Maybelline Fit Me.
Of course, I have to set it with a powder cause after a few hours I become a shine ball and it's not pretty. The powder I use is the Rimmel Stay Matte in 01 Transparent. If I'm feeling really lazy, I'll use the same brush to apply it, if not, I'll get an angled flat kabuki. Also, I feel like I don't have to touch it up too much during the day, so that's another plus.
That's it - a super quick and simple technique leaving you with a lovely natural looking finish.
Bloglovin | Twitter | Tumblr
Share
Tweet
Pin
Share
No comments
There are tons of no makeup-makeup looks, so why not make a no mascara-mascara one? Basically, I'm gonna tell you two really simple steps for achieving this look. It will make your eyes pop and your lashes will be nice and luscious without the fuss of applying mascara, cause sometimes it's just nice to skip it, right?
You only need two things in order to get this look - eyelash curler and some lip balm. 
First step: curl your lashes so that they have a bit more volume and curl to them (obviously).
Second step: take the lip balm and apply it on you lashes using your finger.
And there you have it - a natural looking mascara look. Obviously you don't have to go for this look if you prefer something more dramatic, but I think it's a good alternative for those chill days when you can't be bothered with applying and removing lots of makeup.
Unfortunately I don't have any pictures to show you what it looks like, but you can figure it out on your own.
Bloglovin | Twitter | Tumblr
Share
Tweet
Pin
Share
No comments
 My skincare routine is really simple and quick. It's not revolutionary, or anything, it's just what I do to my face to try and make it nicer. I prefer spending time on my skincare at night, so here's what I do.


The first step in my routine is removing my makeup with the Garnier Micellar Water Fresh. If you wanna know what I think about it here's the review.


The next thing I do is wash my face with this soap which from Nour, which is organic and made with laurel. It makes my face a bit softer and smoother. 


Next up is toner - the one I'm using is from I Provenzali and it's marked to be for adolescents. It's got a really subtle rose scent, it's definitely not overpowering and it doesn't linger. I think it's helped me with my break-outs and it really calms and soothes my skin. My face feels really nice and fresh after this step, which is why it's my favourite one to do.


Last, but not least, a step I've recently included into my routine and it's this lotion type of thing. It's from the same brand, but this one is for removing makeup or moisturizing. I use it to moisturize my face and get some life back into it. It feels really light on the skin and you don't need to use a lot of it. It's not sticky or tacky at all, it just hydrates the skin. 
I Provenzali is an Italian brand (obviously) and it is completely organic and eco friendly, so it can't be bad for your skin. Both of the products I've mentioned are really gentle and harmless.
 ***DISCLAIMER: I am not being paid to say this, I genuinely like using their products.
That's all I do to my skin, hope you enjoyed this post.
Bloglovin | Twitter | Tumblr
Share
Tweet
Pin
Share
2 comments

For me, eyebrows are the most important step in my makeup routine. I've recently discovered a technique that works wonders. 
I only use two products, which you can see in the picture and which I've mentioned many times already - NYX Eyebrow Cake Powder and Alverde tinted eyebrow gel. Both of these I have in the shade Blonde, although maybe I should purchase darker ones next time.
The first thing I do is brush my brows in the shape that I want them with the little spoolie that comes with the NYX powders. When that's done, I dip my H&M Smokey Eye brush (the angled side) into both powders and then the wax. Then, I outline my brows on the top and bottom and gently fill them in. It may sound simple, but it can take quite some time to get them as even as possible. The last step is, obviously, setting them with the eyebrow gel. Not only does it set them, but it gives them a bit more texture and structure so they don't look shiny from the wax. 
That is my whole brow routine. At the moment, I like my brows to be straight with only a slight arch at the very end. Here are some random selfies to show what I mean:


Bloglovin | Twitter | Tumblr
Share
Tweet
Pin
Share
No comments


 Lately, I've been enjoying rocking a minimal amount of makeup and going for a really natural look. Here's what I do:
1. The first step is the base. To accomplish the 'my skin but better' look, I've been using the L'Oreal True Match Foundation. I apply it with my fingers and only on my trouble areas - my T zone. If you want a more in depth explanation of the product, here's my review.
2. After my face looks acceptable, my dark under eye circles are still bothering me, so in order to look less like a zombie I use the L'Oreal True Match Concealer. The way I apply it is by making little spots on the outlines of my under eye circles. I usually blend it in with my fingers.
3. Now that I finally look more like a human, I want my face to stay that way so I make sure to set it with a powder, which is, obviously, the Rimmel Stay Matte Powder.
4. Finally, with my base all done, I can move on to the eyebrows, which, let's face it, is the most important step. My current routine includes 1 necessary product and 1 optional. The essential one is the NYX Eyebrow Cake Powder. I have it in the shade Blonde, if you're interested. I use both powders and the wax to fill in my brows. I'll be making a whole blog post about my brow routine, so you can read the rest there. 
The optional product is an eyebrow gel (I use the tinted gel from Alverde).
5. The final step is making the eyes stand out a bit. I use either a concealer or an eye primer (from Alverde) first and then I set it with powder. If I'm feeling really fancy, I'll add mascara. The one I'm using currently is the Rimmel Scandaleyes Lycra Flex one If not, I'll just curl my lashes.
Bloglovin | Twitter | Tumblr
Share
Tweet
Pin
Share
No comments


My skin has been much better recently - I still have redness in my T-zone, but I have much fewer spots appearing. Due to this fortunate turn of events, I've managed to find a way to get a really good base which consists of good coverage, natural finish and top notch longevity. Here's what I do...
      Step 1:
I use my green NYX HD Concealer in my T-zone to counteract the redness on my face. I apply it with the small angled round brush from my eBay set. As well as getting rid of redness, I find it makes the next layer, which is foundation/BB cream, a bit lighter. This is a massive plus because both all my base products are too dark for me. If you wanna read more about it, do so here.
     Step 2:
I've been using my trusty Garnier Pure Active BB Cream recently for a few reasons: 1) it's much more natural, 2) my foundation is running out and I'm using it very sparingly and 3) I think it's better for my skin. I apply it with the big rounded brush from the same eBay set. It leaves a nice natural finish and has a medium coverage. If you wanna read my in depth opinion on it, I've done a whole review so just click here.
     Step 3:
This is totally optional (well, so are all the steps), but my under-eye circles are absolutely horrible, so I'm always looking for a way to hide them. Depending on my mood, I use either my Maybelline Fit Me Concealer or the L'Oreal Perfect Match one. I don't use brushes, just my fingers for applying it.
     Step 4:
The last step is powder obviously, cause I don't wanna be looking like a shine ball during the day. I'm obviously using the cult product - Rimmel Stay Matte. I have it in the shade 003 Peach Glow, but I'm sure a transparent one would be just as good. I like using it with either the big flat brush from the eBay set, or my H&M BB Cream/Foundation brush. I only set my T-zone and under-eye area.
     Extra Step:
If I wanna jazz things up a bit, I use the Maybelline Baby Lips in Peach Kiss as a highlighter.
Here's a selfie so that you can get an idea of how it looks. For more examples, visit my Instagram (@tomin_jo).
I think a nice base and a strong eyebrow game is more than enough for an everyday makeup for school and it's what I've been rocking. Hope you got some ideas from this post and if you wanna read my review on the brushes that I've mentioned a hundred times - here. And excuse the intense use of plugs in this post. Goodbye for now.
Bloglovin | Twitter | Tumblr
Share
Tweet
Pin
Share
No comments
Older Posts

About me

Hey, thanks for coming! I have some thoughts and I'm here to share them. Books, beauty, TV and everything in between. Have a look around.

Popular Posts

  • Mixa Hyalurogel Light
  • How To Have A Productive Day
  • a cleanse? (mostly talking about food and skin)
  • Revuele Argan Oil Eye Contour Elixir | Review
  • Elaborating My Favourite Quote | Part 5

Blog Archive

  • ▼  2023 (1)
    • ▼  May (1)
      • missha essence spf 45 | review
  • ►  2021 (1)
    • ►  March (1)
  • ►  2020 (15)
    • ►  December (1)
    • ►  November (1)
    • ►  October (2)
    • ►  September (1)
    • ►  August (3)
    • ►  June (1)
    • ►  May (2)
    • ►  April (1)
    • ►  March (1)
    • ►  January (2)
  • ►  2019 (14)
    • ►  December (2)
    • ►  November (1)
    • ►  September (3)
    • ►  August (1)
    • ►  July (1)
    • ►  May (2)
    • ►  April (3)
    • ►  January (1)
  • ►  2018 (18)
    • ►  November (1)
    • ►  September (2)
    • ►  August (2)
    • ►  July (3)
    • ►  May (3)
    • ►  March (2)
    • ►  February (2)
    • ►  January (3)
  • ►  2017 (54)
    • ►  December (1)
    • ►  November (1)
    • ►  October (8)
    • ►  September (6)
    • ►  August (11)
    • ►  July (6)
    • ►  June (2)
    • ►  May (3)
    • ►  April (5)
    • ►  March (4)
    • ►  February (4)
    • ►  January (3)
  • ►  2016 (102)
    • ►  December (24)
    • ►  November (9)
    • ►  October (9)
    • ►  September (13)
    • ►  August (5)
    • ►  July (7)
    • ►  June (2)
    • ►  May (7)
    • ►  April (6)
    • ►  March (8)
    • ►  February (5)
    • ►  January (7)
  • ►  2015 (108)
    • ►  December (16)
    • ►  November (9)
    • ►  October (9)
    • ►  September (10)
    • ►  August (8)
    • ►  July (8)
    • ►  June (8)
    • ►  May (10)
    • ►  April (12)
    • ►  March (8)
    • ►  February (5)
    • ►  January (5)
  • ►  2014 (44)
    • ►  December (24)
    • ►  November (5)
    • ►  October (8)
    • ►  September (1)
    • ►  August (4)
    • ►  July (2)

Categories

beauty favourites makeup music review Monthly Recommendations advice lifestyle playlist quote skincare tips tv show movies

Created with by ThemeXpose | Distributed By Gooyaabi Templates